How We Hung Curtains On Our Extra Wide Windows
We have two extra wide windows with gorgeous views in our principle bedroom and in our living room/great room.
We were lucky enough that our home’s previous landlord installed some Ikea curtains in our living room. Unfortunately, from the moment I saw them, I hated them.
The curtains in the living room are too short (see below) and the rods are hung too low and too narrowly. Oh, and they used two separate curtain rods right next to each other.

Now, I have seen this solution of side by side curtain rods work well in other homes (see Young House Love’s principle bedroom), but it does not work here. That might be because the person installing the rods didn’t think about where the curtains would hang at all or because in YHL’s house, each curtain rod fits its space, rather than splitting the space into thirds or quarters.
When we moved in, I thought this would be one of the first things I would change. But curtains are expensive and I didn’t know how I would repair the holes left from the original hardware because we don’t know the paint color (and the original landlord never wrote it down), so this has lingered on my to do list for over a year.
BUT NO LONGER!
Until a few weeks ago, I had never found a curtain rod wide enough for our living room. And then there it was. It just showed up on Amazon and it was even longer than we needed!
The company is called Rod Desyne (I think it’s supposed to be pronounced like “rod design”?) and it seems to have some good options for tricky window situations like ours and for windows around corners.
Before I show the result to you in all it’s glory, here’s a reminder of the curtains and window before:

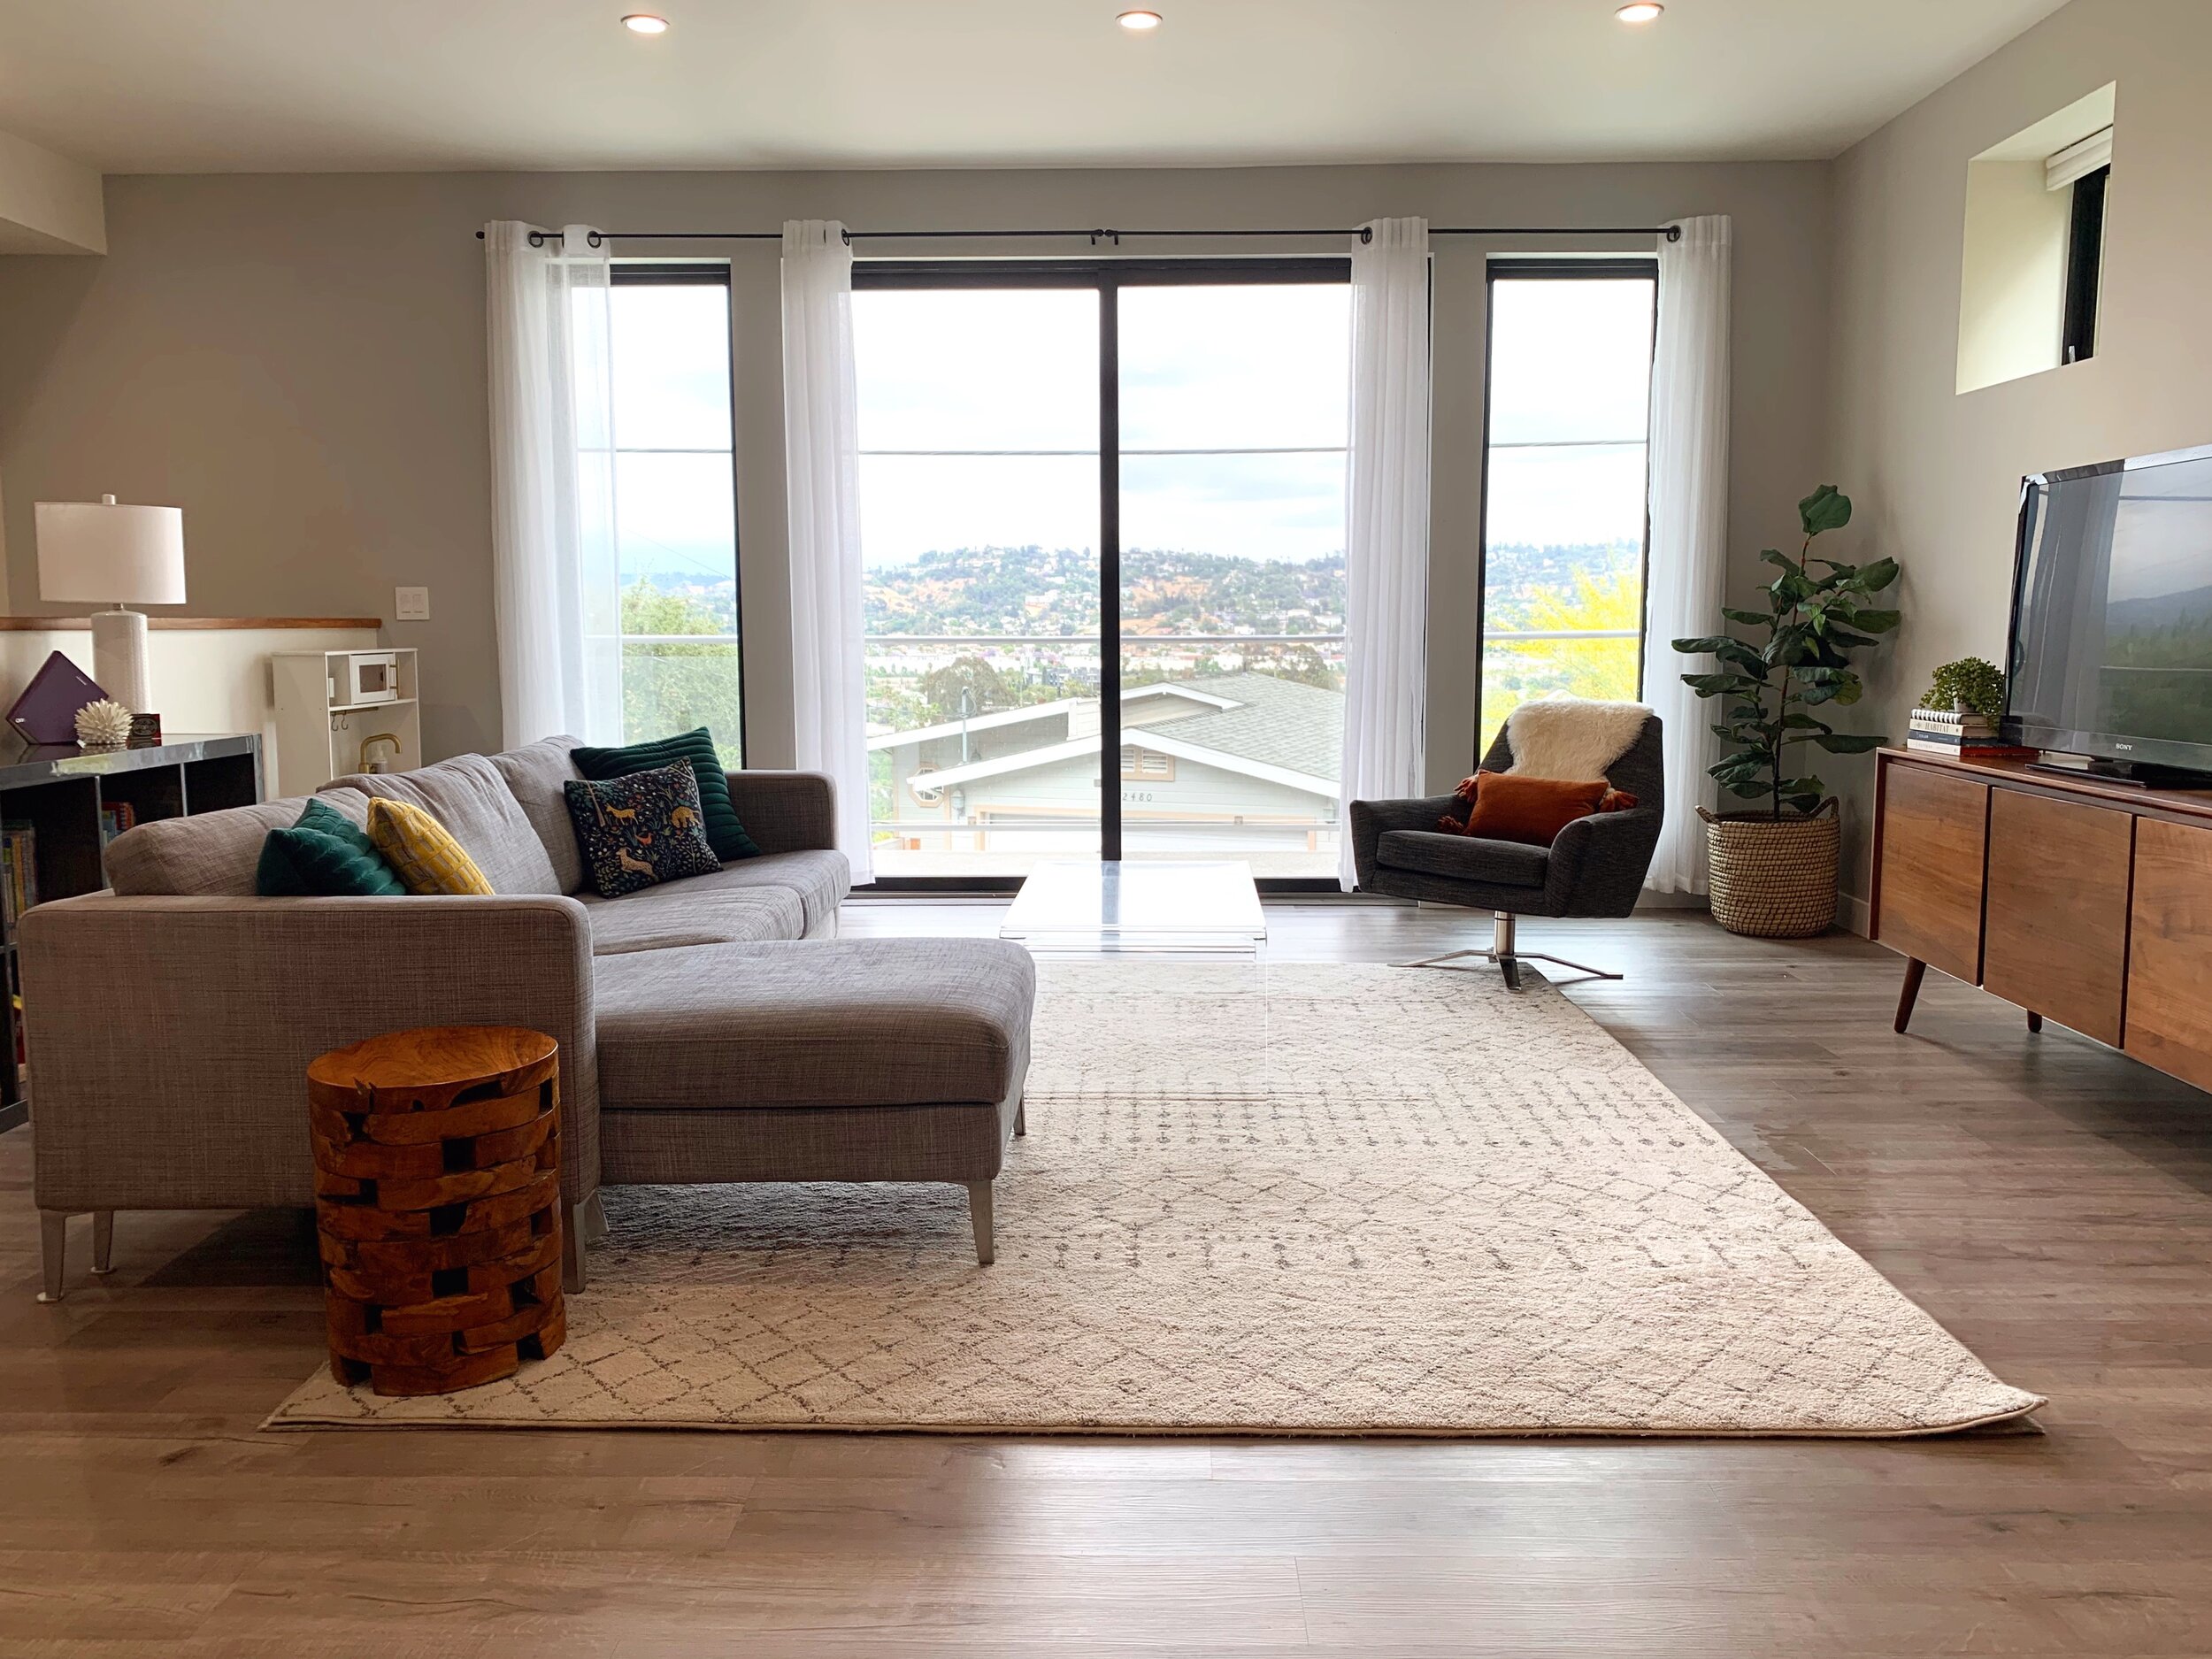
And here are the new curtains and rod:

I think they look marvelous! And don’t they look like they’ve always been there? Like they just, you know, belong?
That probably is a given for most people, but I’m quite impressed with myself that I patched and painted the wall so well that the curtains and rod look so at home here.
Now on to how we went about making them look so good: I lucked out that when the curtain rod arrived, my in-laws were visiting and my father-in-law is quite handy. He helped us out with installing it.

Now there were a lot of questions about how wide and how high to hang the rod, which I was marginally prepared for.
Normally, I’d ask Denis to pretend to be the curtain rod and hold up the curtains so I can see where they fall and how high to hang the curtain. But I knew from previously measuring the wall that I didn’t want the curtain rod hung for 96” curtains because that felt too low and 108” curtains were just slightly too long for the wall. I opted for the 108” curtains and planned to hem them.
I’ve read differing opinions on curtain rod height and placement. Some people want to hang theirs as high as possible (there are even rods you can hang from the ceiling!), while others recommend 4-6” above the window frame. Now I love a high curtain, it draws your eye up and makes the room feel taller, and dare I say, grander?
To get that tall, grand feeling, we landed on 6.75” above the windows so that the rod was closer to the ceiling than to the windows. Even though our home is only three years old, it turns out our ceiling is not level, so this is why we (and by we, I mean my husband and father-in-law) made sure to measured from the windows up instead of from the ceiling down.
For the brackets, I had read that you should hang your curtain rod about six inches past the window’s sides, so that’s what we did. That’s probably the case with most curtain rods because you usually don’t have multiple panels on each side of the window.
To avoid making your window feel smaller, it’s best to hang curtains so they fall on either side of the window, with the just barely kissing the outer edge of your window. And a bonus of this technique is that your curtains don’t block any light when they’re open.

Unfortunately I didn’t think of the impact the number of panels would have on their width when were hanging, so I do wish we had placed the brackets a tad farther from the window, especially since it looks like I’m going to need to order one more panel for each side to give us enough coverage when we close our curtains.
I was a bit surprised to read in the instructions that if the curtain rod is going to be hung as wide as our window or if you’re going to use more than two rods, that the company recommends using more than the typical three brackets. Using more brackets would leave us with curtains still hanging in the middle of our window, which I definitely didn’t want, so I decided to give the rod a try with the traditional three brackets and hope for the best.
And it works! Hallelujah!
The curtain rod comes with these little plastic rings to keep the curtain rods from slipping back and forth when you open and close the curtains, but we still needed an extra ring to make a thinner rod thick enough for the screw on the bracket to reach it. No problem, I just reached out to Rod Desyne’s customer service and they sent me a few more.
We usually use curtain rings with clips or just hang curtains from a rod pocket, but I’m so tired of curtains falling from the clips (probably because some of our curtains are too heavy for clips) or curtains with the rod through the back being hard to slide, that I decided to try a new technique that I am loving!
The curtains we ordered have this handy dandy strip on the back where you can insert a curtain pin and then hang the pin from closed rings.

I don’t think most curtains come with these strips, but I think you can either iron/sew them on or you can order ones that have these baked in. We ordered these in Rice White from Half Price Drapes via Amazon specifically because they had this feature. Also, the price was unbeatable. Some Pottery Barn curtains I looked at had this feature but for about three times the price per panel.
I read that it’s recommended to hang the curtain pins 8-9” apart, but that didn’t work out perfectly for me because that often fell underneath a rod pocket tab. I did my best to get as close to 8 or 9” inches as I could, and then adjusted the placement once I put them up on the rod.
To find the right length for the curtains, I hung them up and pinned one until it fell about where I wanted the curtains to end (somewhere between touching the floor and max 1/4” above the floor).
In retrospect, there are a few things I would have done differently at this stage. First, I would have put a panel on either side of the window because it turns out that either the left side of the curtain is hung ever so slightly lower or the floor is ever so slightly higher on the left side of the window. Second, I would have pinned a tad higher because the curtain ring pockets on the back seem to have stretched or relaxed a little bit since I’ve hung the drapes and that means the the curtains are just a little longer than I’d like them/than I was expecting when I pinned them. But I was replacing curtains that were so short, I didn’t want to have that problem again, so I erred on the side of a little longer.
Now even though I own a sewing machine, I’m not confident that I can sew a straight line, so I opted to hem the curtains with stitch witchery tape, which turns into a fabric glue when you iron it.
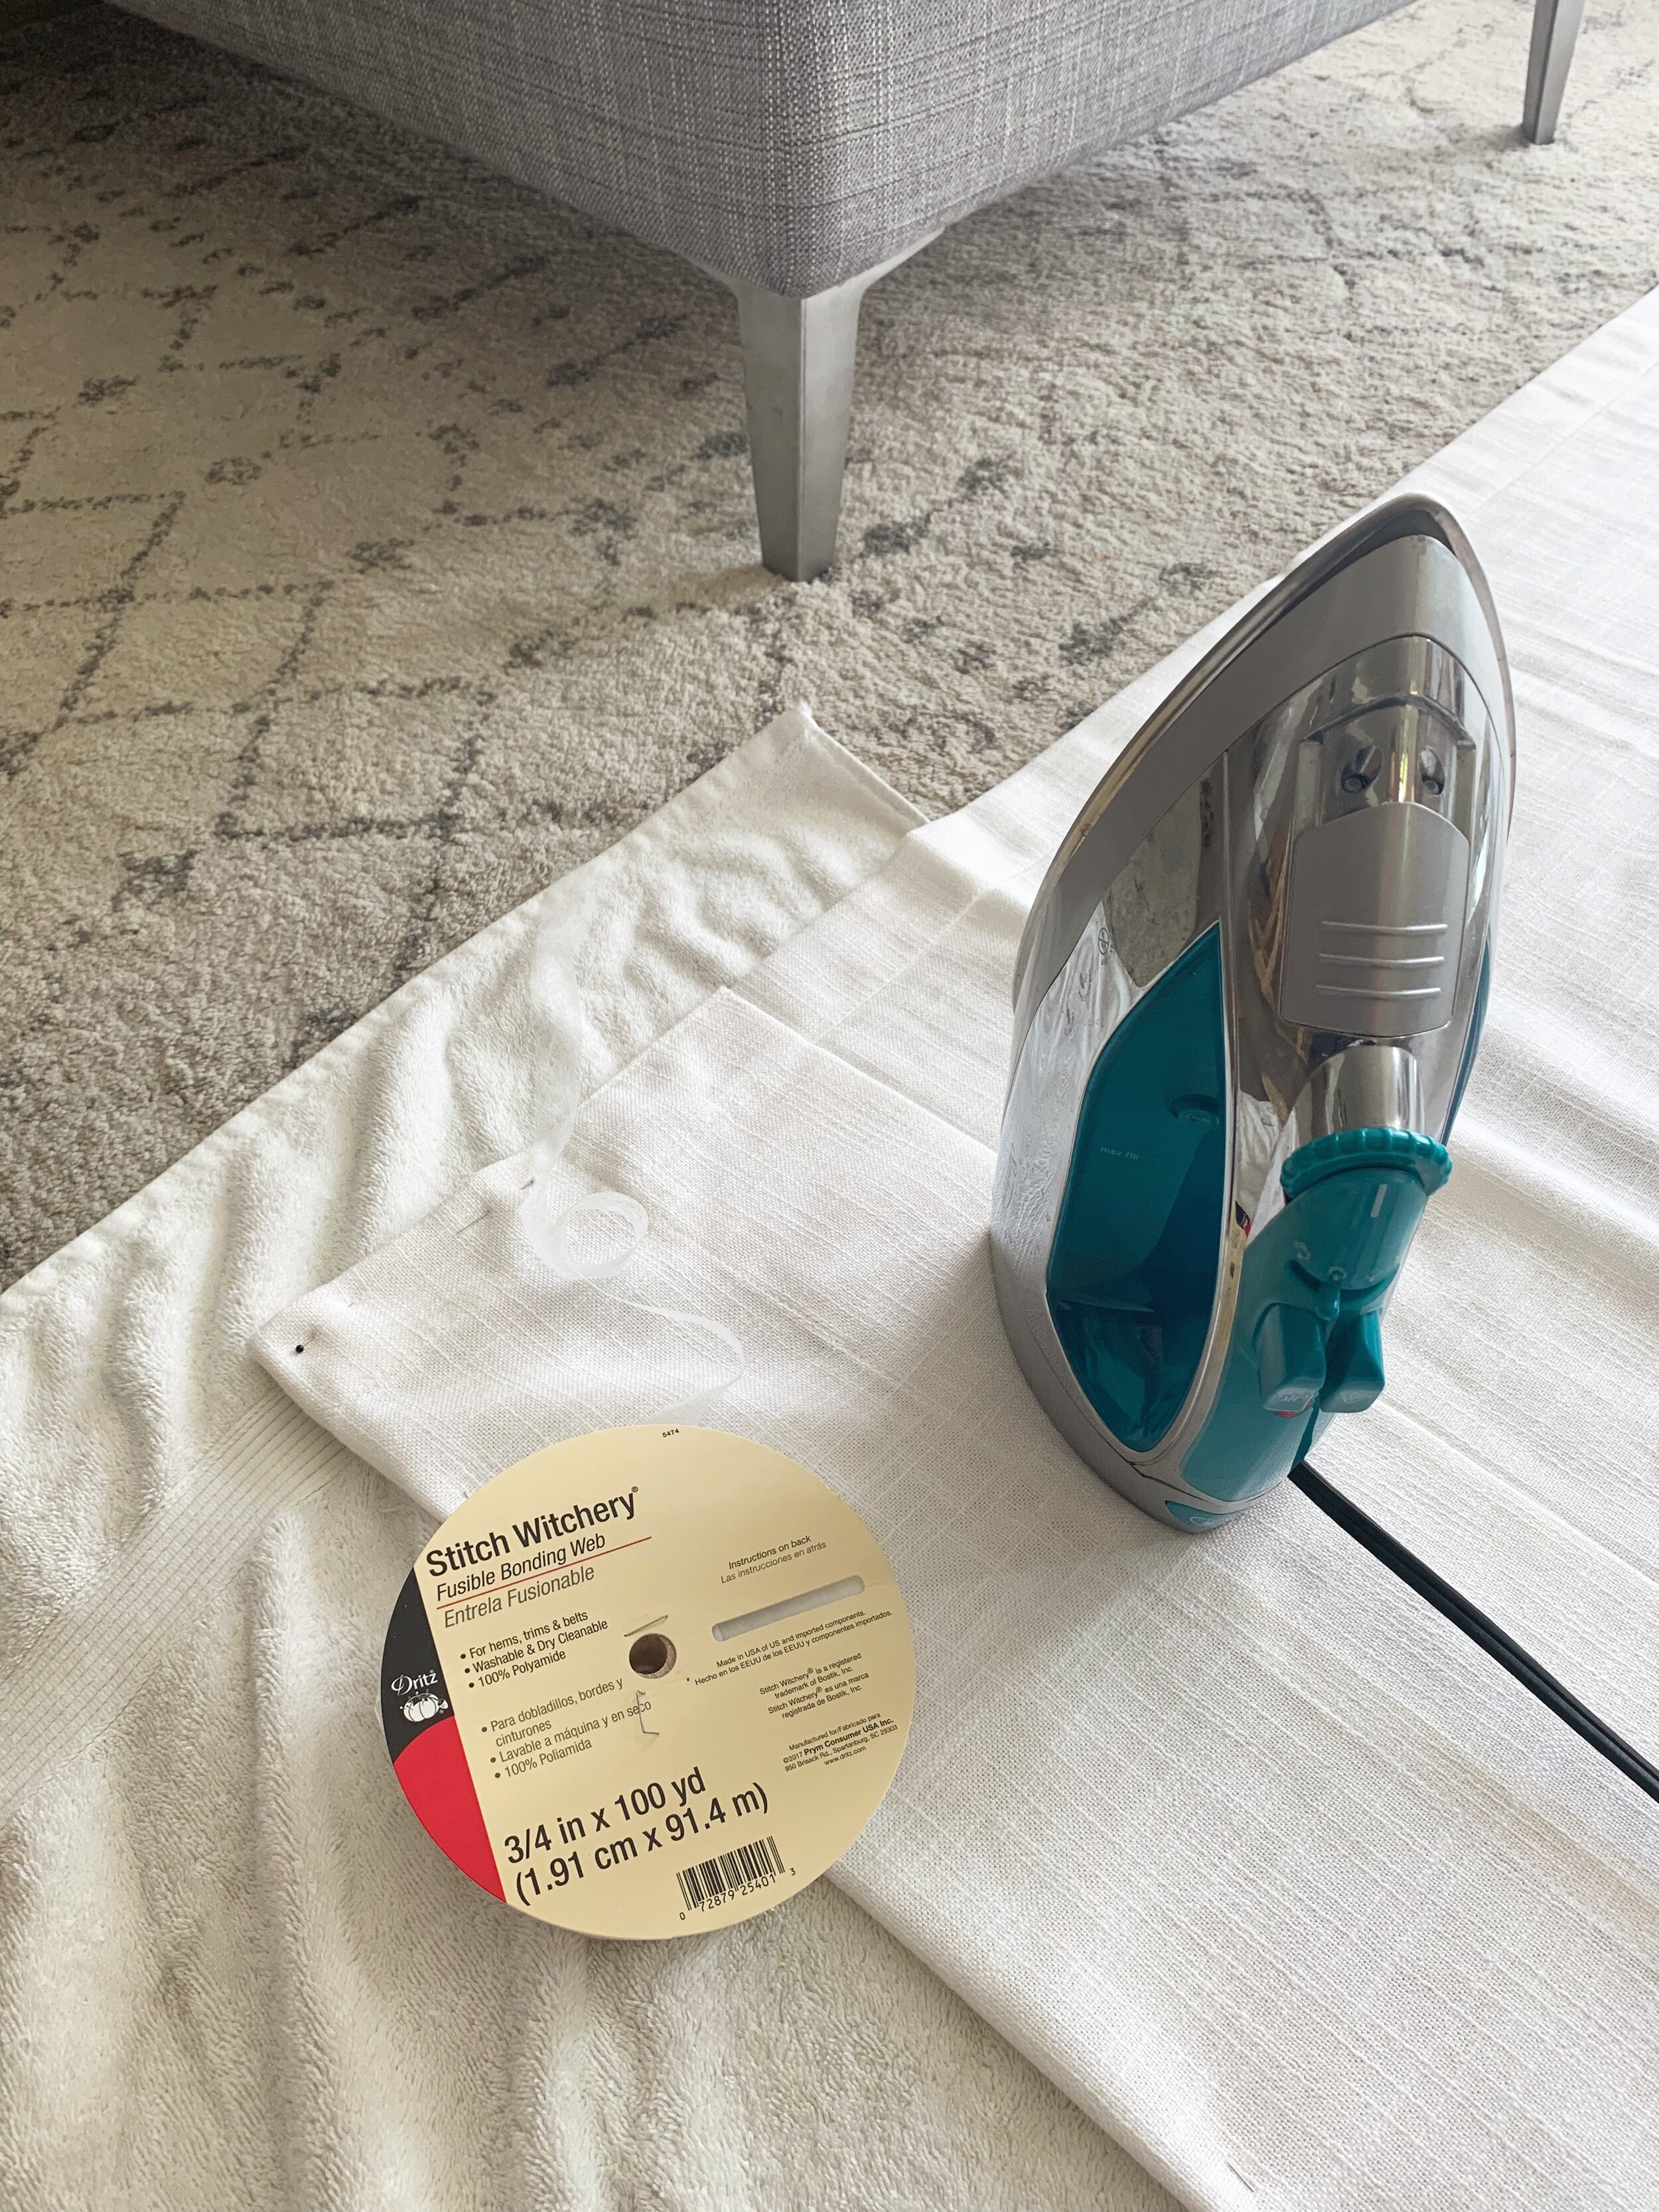
I put Great British Bake Off on the TV and laid out one curtain at a time on the ground to measure and hem each one. I tested the first panel out by hanging it up on the rod to make sure I’d done everything correctly, and then just kept going with those measurements from there. I hemmed each panel a whole 9”.

For some reason, I thought the brackets and screws would be fairly easy to pull out. Boy, was I wrong! The space between the screw and the brackets was so narrow, there wasn’t space for a drill to screw them in or out. Unfortunately, that didn’t stop the person who installed them, which meant I was left with stripped screws. Awesome.
I’ve dealt with strips screws before and I know that putting a wide rubber band between the screw and the screwdriver can help you get them out. I did this but it took a long time and was hard. We also have stripped screw drill bits, which I tried, but that took even longer than the rubber band method and left me just as or more tired. So I went back to the rubber band method, with the exception of the screw that I stripped even more with the stripped screw drill bit, which Denis was able to get out by basically using a wrench as a screw driver.
I’m ashamed to say I only removed one molly. In the process, I felt like I was doing more damage to the wall than I would if I just left them in, so that’s what I did.
For patching everything up, I used Dap’s DryDex Spackling with a dry time indicator and a wide putty knife because I couldn’t find my narrow one. I highly recommend using a narrow putty knife if you have one, it’s much easier. Patching is actually surprisingly easy and as a perfectionist, it’s something I excel at. Unlike with painting wood (which perfectionism is not helpful for), it’s perfectly fine to apply more or use the putty knife to keep smoothing things out. If it feels like I can’t quite get the putty smooth or it keeps moving and leaving gaps when I use the putty knife, then I figure I’ll need to do some more once what I’ve already done dries.

Once everything dried, I used some very light 220 sanding paper I had left over from another project and sanded down the bumps to make everything nice and smooth. (Oh, and I used a Magic Eraser to wipe away the pencil marks from installation.)
For the paint I used the paint I had matched at Home Depot. This is probably the part that was most important to making the whole thing look like it’s always been there.
I used an exacto and cut a piece of paint off the wall a little larger than a quarter and brought that into Home Depot with me. (I picked a spot next to a chip in the wall so I could patch both in one go. We have the weakest walls, by the way, with chips everywhere and I’ve never had that problem before so I know it’s not me.)

At the paint counter, I asked for it to be color matched and told them what finish I wanted (matte to match the paint that’s on the wall). About 10-15 minutes later, the guy behind the paint counter slid a quart over to me.
Here’s the important part: It was the wrong color. They always take a little dab of paint and put it on the top so you can see what color the paint is before you open the can. Turns out the clerk matched the wrong side of the paint swatch to color match. That happened one more time and then we got the right one. He used a blow drier on that little dab of paint and compared it to the swatch I provided before handing that one over to me.
It was a lot of steps, but it was so worth it.
We get more light, can see more of our view, and just as importantly, I’m not annoyed every time I look at the curtains.